Matt

Hugh

Justin

Sawyer
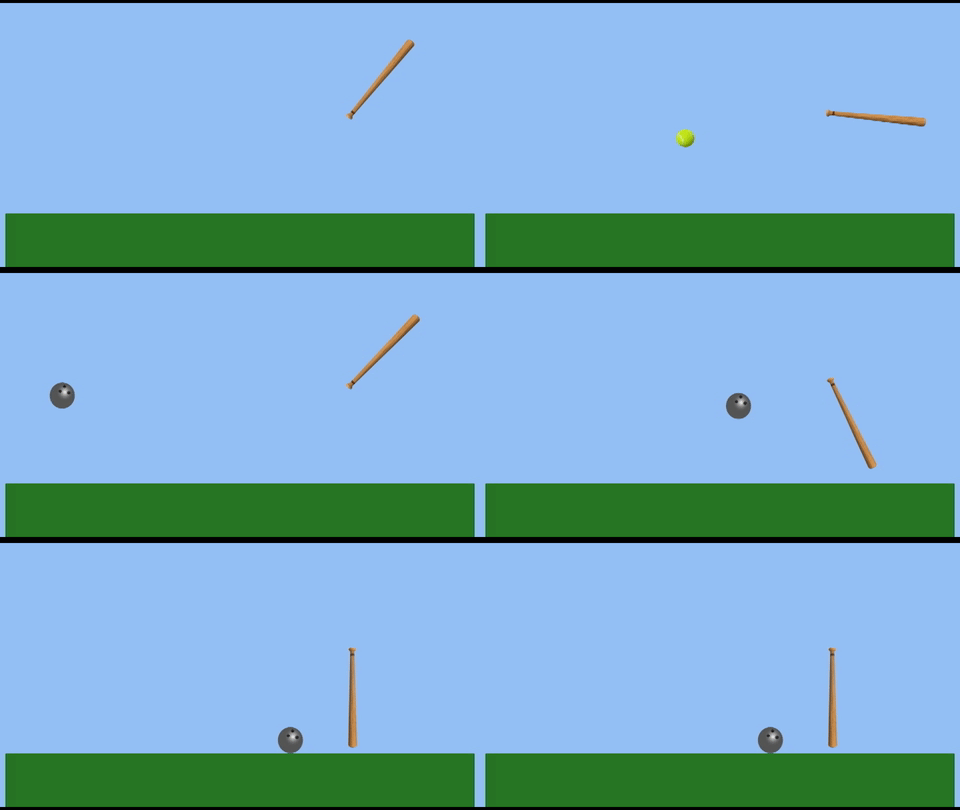
Bri

Alec

Ashley

Matt

Hugh

Justin

Sawyer

Bri

Alec

Ashley

Stop Motion Reality
One of the most visually inventive animators I know of is PES, an American animator whose stop-motion films often incorporate everyday objects in clever, unexpected ways. In addition to short films, PES has also done some very interesting ad work. Check out the following examples – there are tons more on his YouTube channel as well.
Moving Forward
It’s time to dive into After Effects. As we explore the program, consider the things we’ve discussed so far – like cartoon representation and the twelve basic principles of animation – and try to incorporate them into your projects.
After Effects is designed around creating media, often using assets created in programs like Illustrator and Photoshop. After Effects is the perfect application for building animated titles and lower thirds, is a powerful tool for character animation, and can be used for compositing and special effects work. It is often used in concert with other programs to create sophisticated video content.
After Effects is also deeply customizable. There are countless plugins and presets available for After Effects that can completely alter the capabilities of the program. These run the gamut from 3D modeling to automated text animation to particle effects and everything in between. Websites like aescripts and Video Copilot are fantastic resources for adding functionality to the application. Larger companies like Red Giant and GenArts make more sophisticated — and often expensive — add-ons for even more advanced professional-grade work. However, even without external plugins, After Effects is an incredibly powerful platform for media creation.
Setting Up A Project
When you open up After Effects, you’ll likely see a splash graphic with the usual options for starting a new project or opening an existing one. After Effects does not require you to set a project location or save before you start working. I’d recommend keeping everything organized in a central folder, sorting your media by type, and saving frequently.
In After Effects, you’ll be working in compositions. You can create a new composition by hitting Cmd+N, selecting “New Composition” from the Composition dropdown menu, or by clicking the icon that looks like a scene inside a filmstrip at the bottom of the Project panel. You’ll be greeted with a menu that gives you options for resolution, frame rate, and the duration of the composition. There are several presets to choose from and they are actually pretty helpful. For this class, use the HDTV 1080 24 preset.
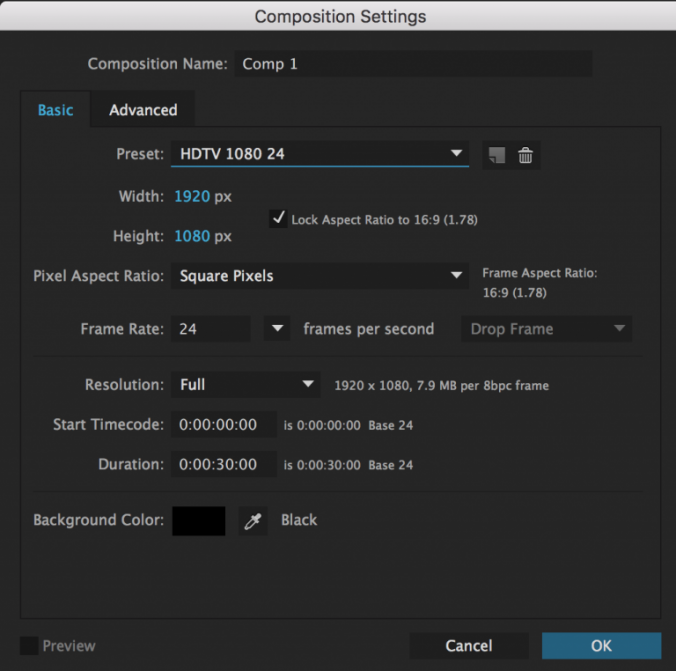
Hitting “OK” will open up a new blank composition. You’ll be dragging media into the Timeline and your work will be visible in the Composition panel. There are no pre-determined audio or video “tracks” in the Timeline window; pieces of media simply stack on top of each other. Every video or audio clip, still, adjustment layer, text, and shape appears as its own layer in the Timeline. You can also drag one composition into another or put footage into a “pre-composition”. You can rename media in either the Timeline or the Project panel by highlighting something and hitting return.
To get that media into After Effects, you’ll need to import it. You can import all kinds of things – stills, video, music, 3D files, even other After Effects projects – by going to File>Import>File… in the top dropdown menu, hitting Cmd+I, or just dragging things from the Finder into the project window.
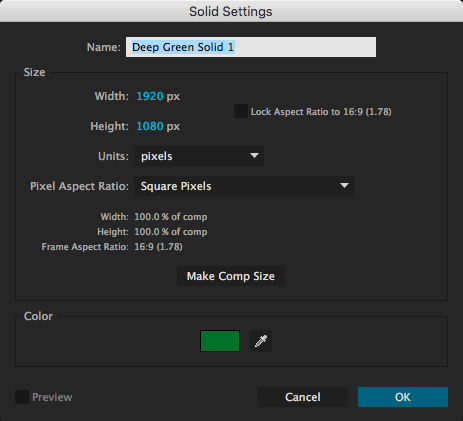
You can also create pieces of media such as solids and shapes to use within After Effects. A solid is a simple block of color. Go to Layer>New>Solid… or hit Cmd+Y to define the color and size of the solid, then hit “OK” to create it. It will automatically appear in the timeline of whatever composition you are working on. To create shapes, use the masking tools (discussed below) without selecting a layer in the timeline. In other words, simply select a mask or pen tool and begin to draw in the composition window. If do you have a layer selected, that layer will be masked instead of drawing a shape – we’ll go into this in greater detail next week.
Tools

If you’re using the “standard” layout, you should see a bar of tools across the top left section of the screen. These are what we’ll be using to interface with After Effects, so it’s essential to know what they do.
From the left, the first tool is the arrow selection tool. This is what you’ll be using most of the time. Its keyboard shortcut is V.
Next is the hand tool, which moves your view around in the composition window. You can press H to select the hand tool or you can hold the space bar down to switch from your current tool to the hand tool. This is the quickest way to move around you composition.
Next is the zoom tool, which looks like a magnifying glass. The zoom tool is pretty self-explanatory: it zooms your view of the composition window in; hold alt/option to zoom out. This is useful, but a faster way of zooming is by using the scroll wheel on your mouse: scrolling up zooms in and scrolling down zooms out. There are also zoom controls in the bottom left corner of the composition window.
The circular arrow is the rotation tool, which can be selected using the W key. This rotates media in the composition window. Next to the rotation tool is a dropdown menu with several tools related to virtual cameras – we’ll discuss those later in the semester when we go over 3D compositions.
Next to the camera tools is an incredibly useful tool that looks like four arrows in a dashed-line box. This is the pan behind tool and you can select it using Y. The pan behind tool is used to change the anchor point of a piece of media without moving the object itself. This will prove very helpful when we begin to do character animation.
Next to the pan behind tool is a dropdown menu with tools for either creating different kinds of masks or different shapes (Q). Then there are the pen tools (G) which can also be used to create masks or shapes. The horizontal and vertical text tools are next (Cmd+T).
We won’t be using the next few tools very often, but they are: the brush tool, the clone stamp tool, and the roto brush tool. The last tool, which looks like a push pin, is the puppet pin tool (Cmd+P on a Mac, Ctrl+P on a PC), which we’ll use for character animation.
Transform Properties
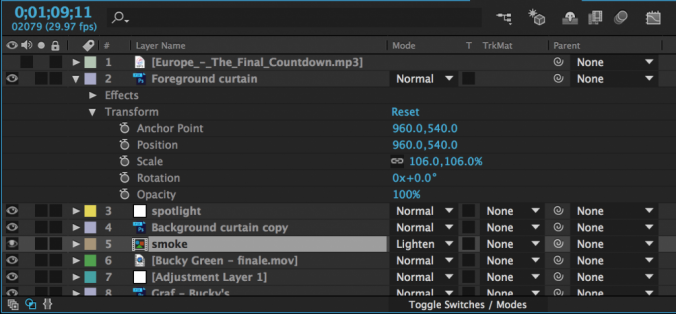
Let’s manipulate some media in After Effects. After Effects has an Effect Controls panel, but it is only used to control effects. The timeline, on the other hand, is where you to modify properties like scale, opacity, and position. On the left side of each piece of media (or layer) is an arrow that can be tipped down. Clicking it will reveal three categories of properties that can be adjusted: masks (if any have been added), effects (if any have been added), and a section called “Transform.” These categories always appear – and are applied – in this specific order: first, masks are applied, then effects, then transform properties. If your media includes audio, that section will appear last.
Clicking “Transform” will reveal the following properties: anchor point, position, scale, rotation, and opacity. Most of these are self-explanatory, although “anchor point” can be a little confusing. The anchor point is basically the central point in an image or video and changing the anchor point changes the way an object rotates and scales.
You will be adjusting the transform properties a lot when using After Effects, so it’s helpful to know their keyboard shortcuts:
A – anchor point
P – position
S – scale
R – rotation
T – opacity
You’ll notice that next to every transform property – in fact, next to almost everything – is a stopwatch icon. This icon turns keyframes on and off. Setting keyframes allows you to animate a property over time. By default, keyframes are switched off – you can tell because the stopwatch icon is greyed-out. Clicking the icon will turn keyframes on and a new keyframe will be set every time an adjustment is made to that property.
Whenever you add a keyframe to an effect or transform property, that keyframe will appear as a diamond shape on the timeline. Keyframes can be moved, copied and pasted, or deleted right on the timeline. A group of keyframes can be scaled up or down by selecting them with the mouse, then holding alt while clicking and dragging a keyframe at the end of the group. You may need to experiment to see just how this works, but After Effects is designed to make adding and modifying keyframes very easy. As a result, you can animate properties with very precise control.
To see all the keyframes on a layer, highlight that layer in the timeline and press the U key. I use this particular shortcut constantly.
Manipulating Keyframes
The ability to keyframe and animate properties is probably After Effects’ most powerful feature; however, that animation may look a little stiff and unnatural at first. For example, if you use two “normal” keyframes to move a shape across a composition, the shape will begin moving abruptly, travel at a constant speed, and then stop abruptly. Sometimes, this is the desired effect, but it’s not how things usually move in the real world. Fortunately, After Effects makes it simple to make animation more natural and dynamic.
By default, keyframes in the timeline are diamond-shaped. This is a standard “linear” keyframe. If you right-click on a keyframe and move down to the “Keyframe Assistant,” you’ll see three “Easy Ease” options: Easy Ease, Easy Ease In, and Easy Ease Out. Easy Ease Out “eases out” a property, meaning it will start slowly and then build up speed. Easy Ease In “eases in” a property, meaning it starts fast and then slows down. Easy Ease is used for keyframes where you want a property to start fast, slow down, then pick up speed again. When you choose one of these options, the shape of the keyframe will change: Easy Ease Out is an arrow pointing left, Easy Ease In is an arrow pointing right, and Easy Ease is basically the other two icons combined.

Easy Ease sounds complicated, but it should quickly make sense once you start playing with it. It’s really an essential tool in After Effects; it makes animated properties – especially movement – seem much more natural. If you’re having a hard time with it, my general rule is this: use Easy Ease Out on the first keyframe in an animation, Easy Ease In on the last keyframe, and Easy Ease on the keyframes in between. If you aren’t sure what to use, the regular Easy Ease is probably your best bet.
If you want to switch back to a standard linear keyframe, you can command click on it and its shape will change. If it turns into a circular shape, command click on it again, until it is back to a diamond.

You can also manipulate certain keyframes within the composition window. If you animate an object’s position in the timeline, you should see those keyframes appear as a path in the composition window. The keyframes themselves are little squares and the dots along the path represent individual frames. You can get a sense of how fast or slow movement is happening based on how close together the dots on the path are.
From within the composition window, position keyframes can be moved just by clicking and dragging. If you click on a keyframe, you will also see curve controls. These can also be clicked and dragged to change the position path of a moving object. If you alt/option click, you can move the curve controls individually. If you select the pen tool (G) and click on a keyframe, it will remove all curves from that part of the path.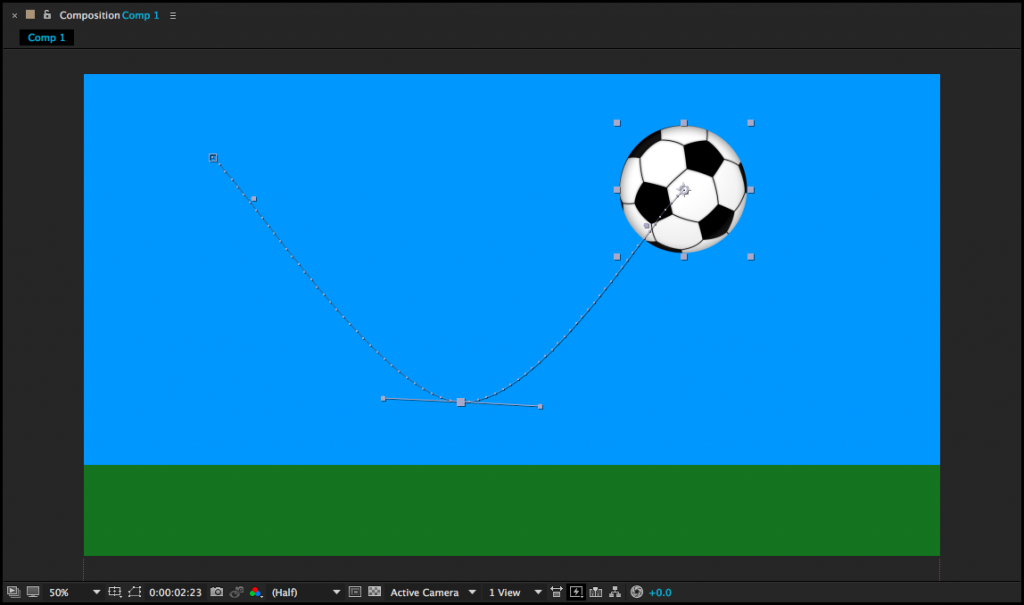
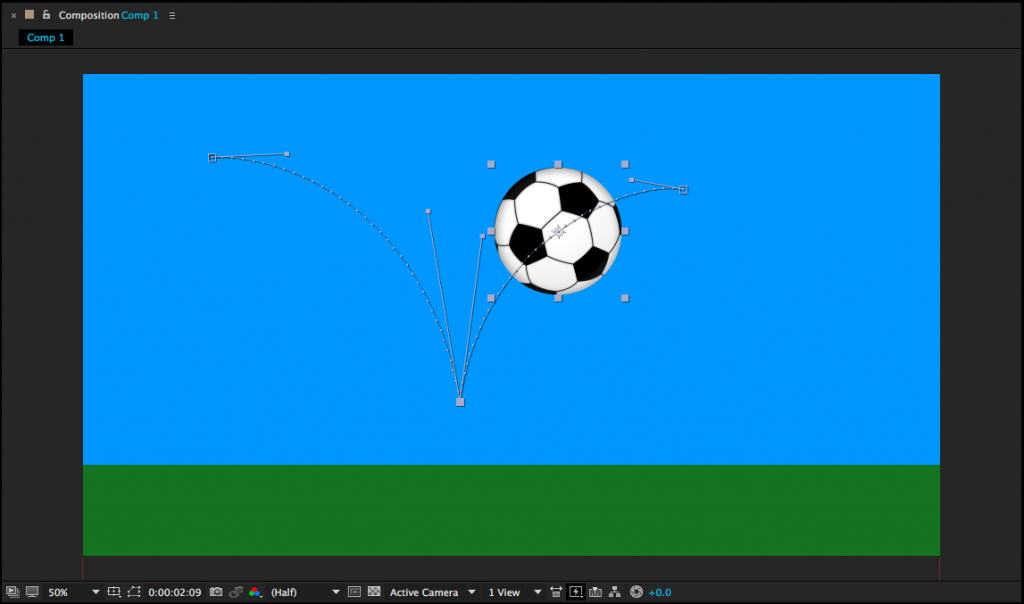
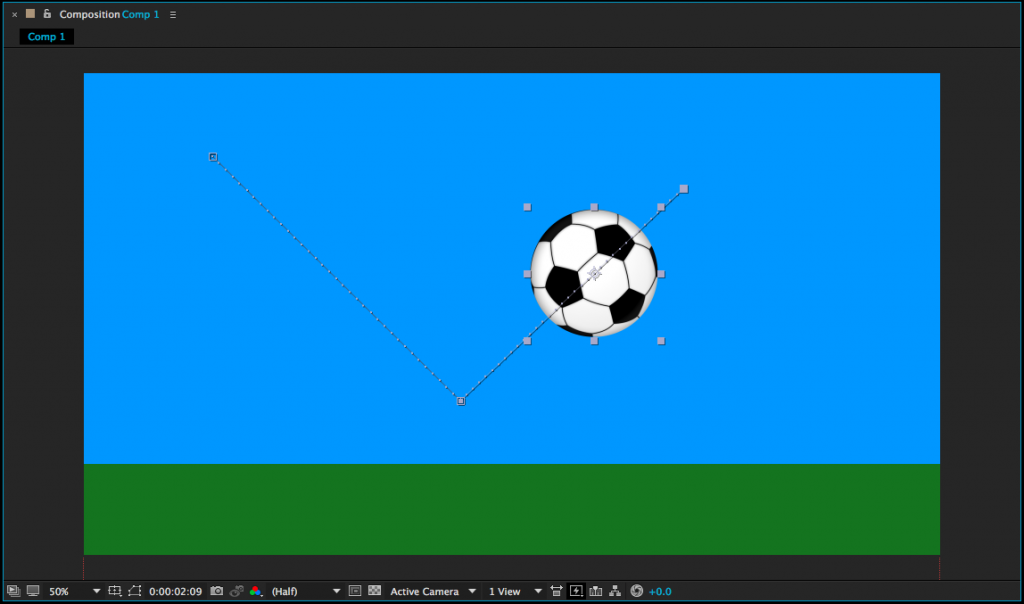
Manipulating keyframes using Easy Ease and curves can help make your animations feel more natural and fluid. Be sure to experiment with these techniques – and remember to consider the basic principles of animation.
Exporting Using the Render Queue
The best way to export in After Effects is using the Render Queue. The Render Queue exists as a panel in After Effects – it may show up as a tab next to the compositions in the timeline (otherwise, you can always find it under the Window dropdown at the top of the screen).

To add a composition to the Render Queue, open the composition in the timeline, then go to Composition>Add to Render Queue. The name of the composition should then appear in the Render Queue panel. Before you hit the “Render” button, you’ll need to set a few parameters. Unless something has been changed, everything in the Render Settings section should be fine at the default values. The Output Module is where you actually make changes to the file type and codec, so click on that to bring up a window with lots of options. For our purposes, just click on “Format Options…” and change the video codec to H.264. Click OK to close each window. Finally, set the file’s destination by clicking on the text next to “Output To:”.
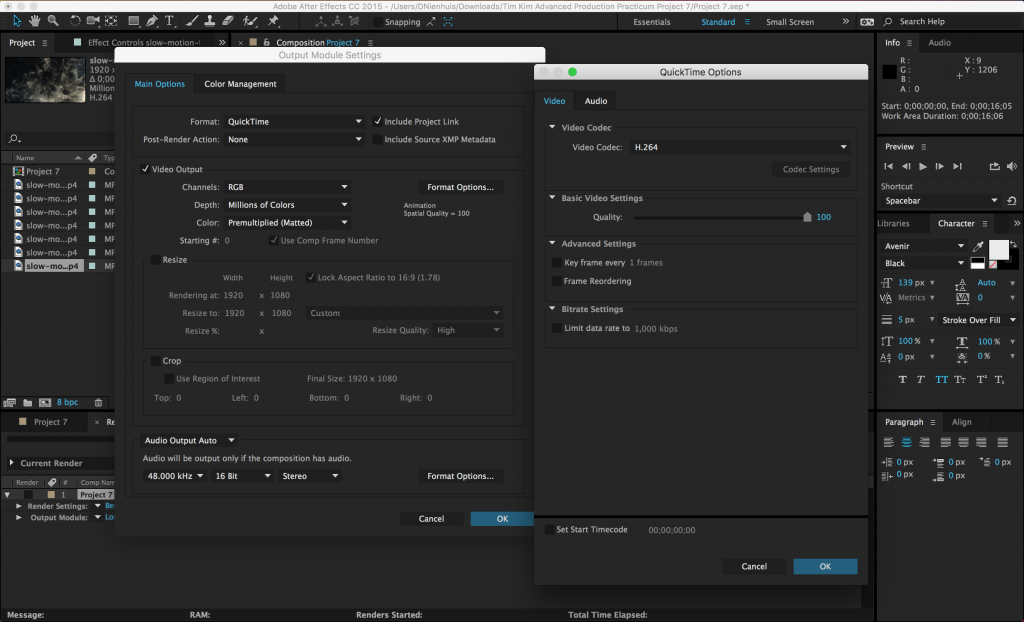
What’s great about the Render Queue is that, if you are working on multiple compositions, you can add them all, then render them together. Just repeat the process of adding them to the queue and adjusting their settings, then hit Render.
Project 3: The Bouncing Ball
You may have noticed that a bouncing ball is used a lot in lessons about animation. That’s because it’s a simple action that clearly and concisely illustrates the basic principles of motion – and animation.
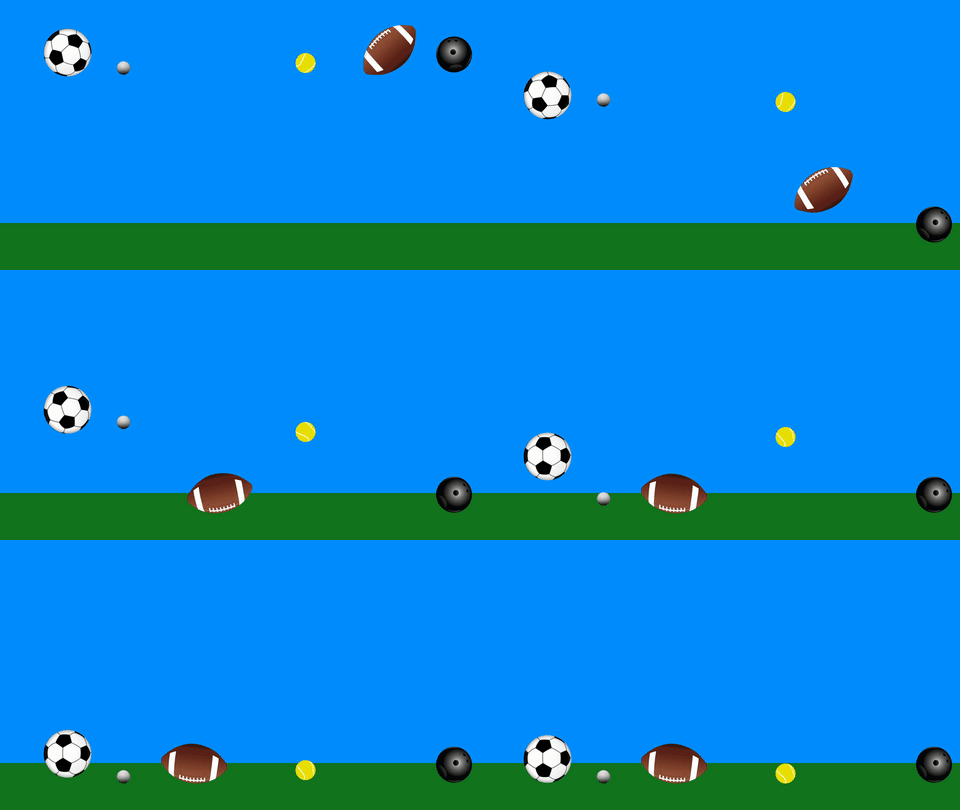
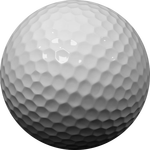
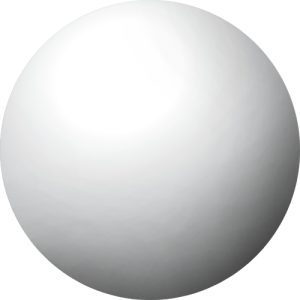
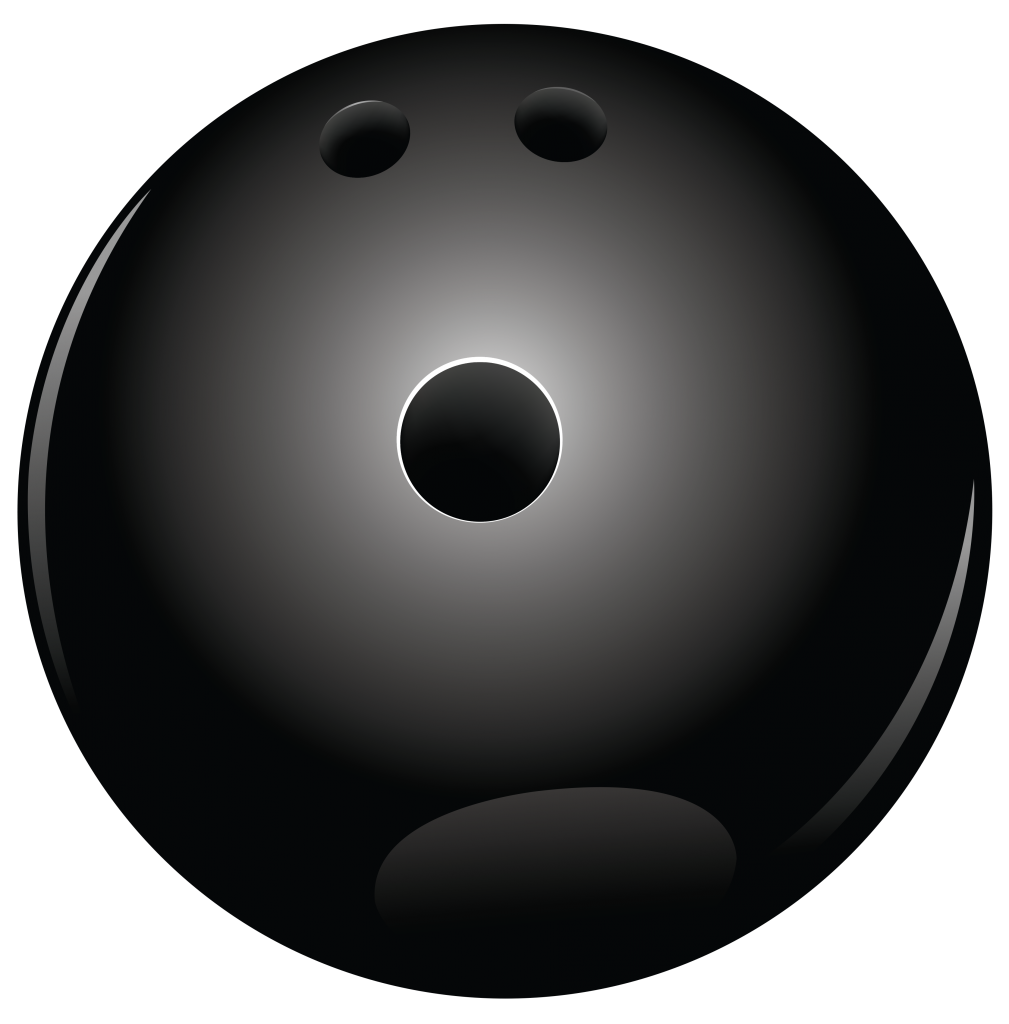
For your next project, download two or more of the graphics below. Your goal is to create a short animation that shows the properties of the kinds of balls you choose. A golf ball should bounce higher than a bowling ball; a football will ricochet differently than a tennis ball will; air resistance will affect a beach ball more than a soccer ball – you get the idea. Use solids or shape layers to create surfaces for the balls to interact with.
Here are the specific parameters:
Have fun!




Bri
Matt

Hugh
Veronica

Justin
Sawyer
Ashley

Alec
Daniel
Keeping Stop-Motion Alive
Seemingly against all odds, stop-motion has persisted as a relevant animation technique to this day. This is partly due to the innovative work being done by Laika, the studio behind Coraline, ParaNorman, The Boxtrolls, and Kubo and the Two Strings.
https://www.youtube.com/watch?v=EgvfVusJS2k
The following short documentaries, each produced by the wonderful Academy Originals YouTube channel, go behind the scenes at Laika to look at how animators, puppet makers, and even costume designers work together to bring these remarkable films to life.